07 December 2023
By Sam Karp
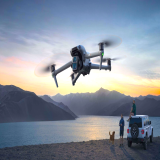
The 03 Air Unit is an incredible video transmission system, and its onboard recording capability is shockingly good. Being able to record full 4K at 120fps and transmit a live FPV video feed is groundbreaking for the world of FPV. It's not quite to the levels of a full size GoPro or DJI Action 4, but I'm willing to bet it's good enough for the vast majority of people, and it allows for 4k/120fps recording from sub 250g FPV drones like the Cinelog 20 or the Pavo Pico without being dragged down by the additional weight of a full sized action camera. Here's what you need to get started recording high quality footage from your 03 Air Unit.
What Are ND Filters and When to Use Them?
If you want to achieve that “cinematic” look for your footage, you'll need to pick up a set of ND filters. Neutral Density (ND) filters control the amount of light let into the camera's sensor. Think of them as like a pair of sunglasses for your camera. On a bright day they cut back the light and darken the overall image allowing for proper exposure. This is especially important on cameras like the 03 where you have a fixed aperture. Without using an ND filter the only way for your camera to properly expose the image would be to raise the Shutter Speed, thus reducing the amount of motion blur captured in camera. We need to lock that shutter speed in order to achieve a nice cinematic amount of motion blur. That's why ND filters are so important. They allow us to choose the settings we want, lock them in, then we select an ND filter to properly expose the image.
I personally use the ND filters from K&F Concepts but any ND filter set for the 03 Air unit will work just fine. Try to pick up a full set consisting of 4/8/16/32 filters. But if you're on a tight budget, just pick up an ND 8 and 16, those are the filters I use 90% of the time.
Basic Settings
Now that you have your ND filters we can dial in the settings. So power up your drone (if you're indoors always take the props off first) and grab your goggles. Keep in mind that the image transmission from the 03 Air Unit to the goggles is tied to what settings you decide to record with, changing these settings will affect your recorded footage, but will also affect what you see when flying the drone. So while these are the best settings to record cinematic footage, if you're not planning to record footage with your 03 Air Unit and are only using it as a video transmitter, just leave everything set to auto and enjoy the flight! That being said, let's dive into these settings!
Aspect Ratio 4:3 vs 16:9
In the settings you have the option between two aspect ratios. 4:3 and 16:9. Typically I prefer to fly at 4:3, it gives you more information as a pilot by expanding the FOV vertically. But since we're prioritizing high quality video, choose 16:9. For whatever reason you only have the option to record 4k footage with the 16:9 aspect ratio. When using 4:3 you're limited to recording at 2.7K. So we'll be using 16:9 so we can record at 4K.
Resolution and Frame Rate
Here we have options all the way from 1080p/30fps to 4K/120fps. The resolution you choose won't affect the video feed in your goggles, but the frame rate will. So if you choose to record at 4K/30fps, you'll be flying at 30fps, which is definitely not ideal as you're only getting a 4th of the visual information that you would when flying at 120fps. Because of this, higher frame rates like 60 or 120, will be much smoother and easier to fly with. So I'd recommend sticking to at least 4K/60fps for most situations, or 4K/120fps if you need super slow motion. Both 4K/60 and 4K/120 use the exact same bitrate of 150Mbps, so if you can manage flying at 60fps instead of 120fps, you'll actually have a higher bitrate per frame in the recorded video.
Here's a list of all the resolution and frame rate options along with what bitrate they'll use. Higher bitrate generally means higher quality.
1080p/120fps - 100Mbps
1080p/100fps - 100Mbps
1080p/60fps - 80Mbps
1080p/50fps - 80Mbps
1080p/30fps - 40Mbps
2.7K/120fps - 150Mbps
2.7K/100fps - 150Mbps
2.7K/60fps - 130Mbps
2.7K/50fps - 130Mbps
2.7K/30fps - 80Mbps
4K/120fps - 150Mbps
4K/100fps - 150Mbps
4K/60fps - 150Mbps
4K/50fps - 150Mbps
4k/30fps -110Mbps
ISO
As a general rule of thumb you want to keep the ISO as low as possible. The ISO is your camera's sensitivity to light, the higher the ISO the brighter your image. This is useful when there isn't enough natural light to properly expose your image. However if you push your ISO too high you'll start to introduce noise and artifacts. Because of this we want to keep the ISO as low as possible, ideally at its base value of 100. Typically I'll leave the ISO set to auto, but then set the max ISO limit to 400. That way if I fly into a dark area, the ISO will increase and I'll still be able to see where I'm flying without introducing too much noise to the image.
Shutter Speed
In simple terms, the shutter speed will affect how much motion blur is in your video.
Lower Shutter Speed = More motion blur
Higher Shutter Speed = Less motion blur
A lower shutter speed will also let in more light and a higher shutter speed will let in less light. This is why we needed those ND filters, so we can lock the camera to a lower Shutter Speed and achieve a nice amount of motion blur without overexposing the image.
With any camera the most natural and cinematic shutter speed will be double your framerate. So if you're recording at 60fps, your shutter speed should be 1/120, or for 120fps it should be 1/240. This holds true for FPV drones as well…for the most part. Because of the nature of FPV a lot of what you'll capture is fast moving action shots, or freestyle footage with lots of fast flips and maneuvers. In situations like this, the “double your frame rate” rule can actually cause too much motion blur and result in a blurry mess of a video.
So here's my recommendation.
If you're flying something slow like a Cinewhoop, or you'll be flying very smoothly with no quick movements or sharp turns, follow the double the frame rate rule. 60fps at 1/120 Shutter speed.
If you're flying a 5inch freestyle drone and doing lots of fast movements, acrobatics, chasing a car, or anything where the camera will be moving quickly with frequent sharp turns, double the double your framerate rule. By that I mean record 60fps at 1/240 instead of 1/120. This will cut back on the motion blur while not completely eliminating it and it will make the video appear less blurry during fast action.
White Balance
To be completely honest, I usually leave the white balance on auto. It's something I always forget to adjust when I'm flying, so leaving it on auto lets me forget about it and just fly. It's not going to affect image quality and you can always set it manually if you prefer.
EIS
Just like DJIs Osmo Action, the 03 Air Unit has built in image stabilization called “Rocksteady”It does a decent job smoothing out the footage and getting rid of any bumps or sudden jarring movements, but it can only do so much. If we turn this off we can actually take the RAW unstabilized footage and run it through a software called “GyroFlow” This software does a much better job than the onboard stabilization. More on GyroFlow later, for now, just turn off EIS.
Advanced Camera Settings
Color Profile. There are two color profiles we can choose from “Normal” and “D-Cinelike.' For our purposes D-Cinelike is the way to go. It provides a much flatter image than the normal profile. It's not quite a LOG profile, but it's the closest we have. This will give us more control in post for color grading.
Sharpness. By default the sharpness is set to 0, but we want to lower it to -1. The default setting of 0 is a bit too digitally sharp, and since we're going for a cinematic look we want a slightly soft image. You can lower this value to -2 if you want a softer image, but I think -1 strikes a nice balance of retaining details without being overly sharp.
Noise Reduction. Again, by default this is set to 0, but we want to set this to -2. We want the camera to do as little noise reduction as possible, this will retain more details in the highlights and shadows. We can always add noise reduction in post if needed.
What is GyroFlow?
Now that we have our settings dialed in and we've recorded some test footage, we can take that footage and run it through GyroFlow. GyroFlow takes the gyroscopic data from the camera and syncs it with the unstabilized footage. Then it crops in slightly and makes the image buttery smooth. Luckily, there aren't too many settings you need to worry about in GyroFlow with the 03 Air Unit. You can drop a clip right into the program and it will pull the lens profile as well as the gyro data automatically. Here are the two settings I end up changing depending on the situation.
Smoothness. Typically I'll reduce the smoothness from 0.5 to 0.25. This reduces the crop slightly and still provides plenty of smoothness to the footage.
Low Pass Filter. The other setting I'll sometimes enable is the Low pass filter. Occasionally with the 03 Air unit you'll run into some weird “Jello” effects if the camera isn't mounted on a shock absorber. Turning on the low pass filter will usually fix that issue.
Full list of the best Cinematic Settings for the 03 Air Unit
ND Filters. ND 8 and 16 are my most used filters
Aspect Ratio. 16:9
Frame Rate and Resolution. 4K/60fps for most situations, 4K 120fps for super slow motion.
Shutter Speed. For 4k/60fps use 1/120, or 1/240 for fast action shots. For 4k/120fps use 1/240, or 1/480 for fast action shots.
ISO. Auto 100-400 max.
White Balance. Auto.
EIS. Off.
Color Profile. D-Cinelike
Sharpness. -1
Noise Reduction. -2
Remember, the settings provided here serve as a foundation, a starting point to help get you started capturing cinematic footage. Feel free to experiment and fine-tune based on your experience and flying style. Embrace the learning process and get out there to fly!