
09 August 2023
By Sam Karp
In my previous article “Introduction to FPV Drones” I went over the basics of what FPV is, as well as a few steps that you could take to get started learning to fly FPV. Today I’ll be diving a little deeper by giving a few suggestions on how to actually get started flying. Well, flying in a simulator at least. In my experience, this is the easiest and fastest way to get started with FPV.
In this article I’ll cover what FPV simulators I use, controller recommendations, what the different flight modes are, as well the basics of how different stick inputs affect the drone. Let's get started!
FPV Simulators
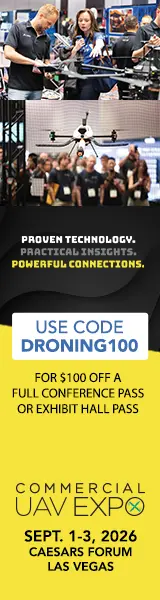
FPV Simulators are an essential part of learning to fly FPV. Flying in the virtual world is a safe and risk-free space to practice and enhance your skills as a pilot. If you crash in the real world you risk causing damage to not only your drone, but also to public/private property. In the simulator you can crash as many times as you like and simply press a button to start over and try again.
In addition to being a much safer way to learn FPV, flying in the simulator also means you’ll only need a controller to get started. Overall this will help you get a better feel for if you want to pursue FPV, and if you don’t like it? Well, you’ve only spent around $100 on a controller and you haven’t spent hundreds if not thousands of dollars on expensive equipment just to find out that this isn't for you. Although I do have a hard time believing that you won’t be immediately hooked like I was.
Here are my recommendations for great simulators to get you flying in no time.
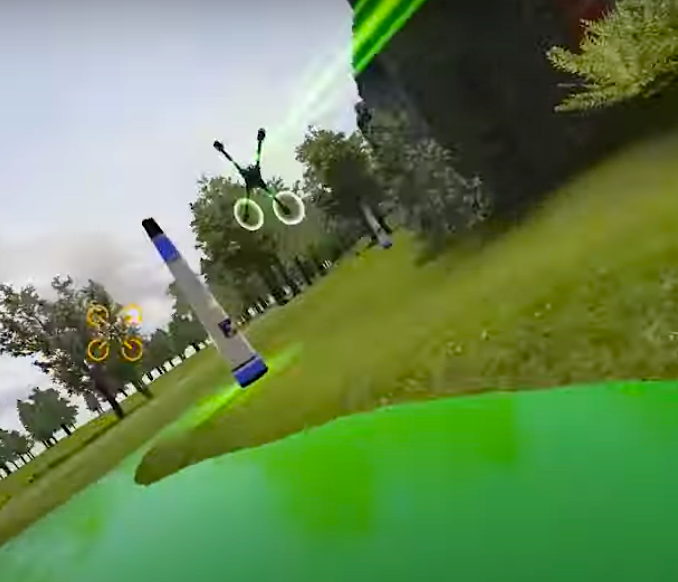
Liftoff FPV Drone Racing. This is the simulator that I’ve put the most time into at close to 50 hours. The physics are close enough to the real world that most people won't really be able to tell the difference, it has plenty of content and some amazing drone customization if you want to really dial it in and get as close to the real thing as possible.
Uncrashed FPV. This, in my opinion, is the most graphically impressive FPV sim out there. It’s kind of bare bones with only a handful of environments and tracks. But it’s very pretty and great for practicing freestyle. For that reason alone I have over 20 hours flown in this one.
Velocidrone. I’ve never personally tried this one, but I know plenty of people who swear by the physics in this sim. It has plenty of environments and tracks and you really can’t go wrong with this one.
DRL Simulator. This is the official simulator of the Drone Racing League. I feel like that’s all I really need to say about it. It has plenty of content, drone customization and even a tutorial that will teach you how to fly. If it’s good enough for the DRL it’s good enough for me.
FPV SkyDive. This is the only free FPV simulator on the list, so if you don’t want to shell out an additional $10-$20 for a simulator this is a great starting point. Just keep in mind that it is free, so it won’t be as polished as some of the other sims on this list, but it will definitely get you up and flying!
FPV Controllers
In my experience the best way to get started flying is by picking up a controller that can be used both in an FPV simulator, as well as to fly your first FPV drone. A controller will be your primary interface with the quadcopter by taking your inputs, then sending them directly to a receiver mounted on the drone. There are a variety of different receivers that each use a different RF protocol. Typically when starting out you’ll be using a standard 2.4ghz protocol such as FrSky or FlySky. These receivers are fine for beginners, but more advanced pilots should look into something along the lines of TBS Crossfire, or the open source Express LRS (ELRS) for a more stable, longer range connection. As you look for a controller, try to find something with a “4 in 1 transmitter” built into the radio. This will give you the most flexibility starting out, and more often than not, there will be a module bay for an external RF transmitter to allow you to upgrade later if you want to.
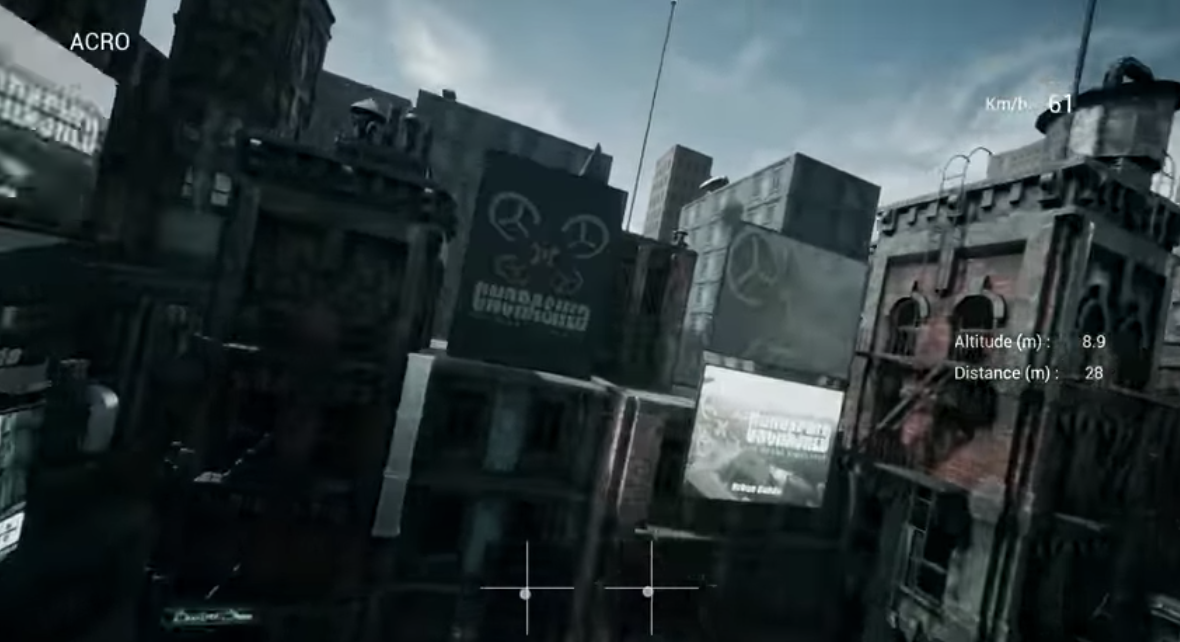
Radiomaster TX 16s Mk2. Fantastic full featured controller. This has become the standard for a lot of pilots and I’ve been using the slightly older Mk1 for years. It has fantastic full sized “hall effect” gimbals for precise control, a large color display, and it comes with ELRS or a 4 in 1 transmitter built in. It is a little on the large side, so keep that in mind if you have smaller hands as it could be uncomfortable for some. $200.
Radiomaster Boxer. Very similar to the TX 16s but more compact and it has a smaller black and white screen vs the TX 16s’s large color display. If I had to start from square one with FPV this is the controller I would get. It’s not too expensive, it has the same fantastic full sized “hall effect” gimbals as the more expensive TX 16s, and it still comes with ELRS or a 4 in 1 transmitter built in. $140.
Radiomaster Zorro. The Zorro is a great option for anyone looking for more of a “gamepad” style controller. It’s much more compact than the other controllers I’ve mentioned and you also have the option for either ELRS or a 4 in 1 transmitter. The only downside is that it uses smaller gimbals. I wouldn’t consider it to be a deal breaker; they're still great gimbals, but in general larger gimbals will give you slightly more control over the drone. $120.
BetaFPV Lite Radio 3. This is the controller I would point you towards if you aren’t too sure that you’ll like FPV and maybe you just want to buy a controller to test out flying in a simulator. It’s cheap, it works, and if you do decide to keep flying FPV you’ll be able to use it with your first drone. Since it’s so small and lacks a screen you’ll probably grow out of it quickly, but it would make a decent controller to dip your toes into the world of FPV. $60.
DJI FPV Controller v2. This is a controller that I can only recommend if you know for a fact that you’ll be flying something with DJI’s digital FPV system. Either DJI’s Avata drone, or something with their 03 Air unit. The Controller V2 is great, very similar to the Radiomaster Zorro in terms of size, but it will only work with DJI products. I will say that it is an extremely seamless connection to set up if you are flying DJI, but if you think you’ll fly anything else, maybe look elsewhere. $200.
Honorable Mention: Radiomaster Pocket. As of right now this radio is available for PreOrder. So I unfortunately don’t have a ton of information about it. It looks to be another fantastic controller from RadioMaster, almost a shrunk down, more compact Radiomaster Boxer. If this is available by the time you’re reading, pick this up instead of the BetaFPV Lite Radio 3. It’s cheaper, has more features, a screen, and if it’s anything like other controllers from Radiomaster, it will last a lot longer. $55.
Keep in mind these are just my suggestions. There are tons of great controllers out there, but I’m just aiming to get you started with a few options that I know will work well. All of the controllers that I’ve listed (minus the DJI controller v2) have an external RF module slot, and the option for either built in ELRS, or a 4 in 1 transmitter. Starting out I would just grab the 4 in 1 as it will work most standard 2.4ghz receivers, and down the line you can always get an external ELRS or Crossfire module for longer range.
Understanding Stick Controls
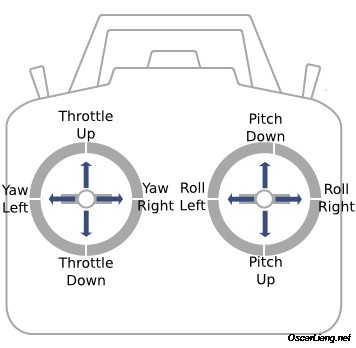
Image courtesy Oscar Liang.
Our resident drone expert Chris “The Drone Geek” Fravel has an excellent article on understanding the basics of drone operation and stick movements that you can check out here.
I’m going to do my best to convert what he talks about into FPV.
There are four axis of control on any aircraft. Roll, Pitch, Yaw, and Throttle.
Roll is controlled with the right stick by pushing left or right. This will roll the drone to the left or right.
Pitch is also controlled with the right stick, but this time by pushing forward or backwards. Think of pitch as either pushing the nose down, or pulling it up.
Yaw is controlled with the left stick by pushing left or right. Think of yaw as spinning the drone similarly to how you would turn your head
Throttle is controlled with the left stick by pushing forward or backwards. This controls how much power is sent to the motors. This stick will be slightly different from all the other inputs as it won't spring back to the center. Instead, it starts all the way at the bottom at 0%, holds its position, and gives you the full range of motion to 100%. Throttle control is one of the more difficult things to get the hang of when first starting FPV, especially if you’re coming from something like the Mavic where the “throttle” is less of an actual throttle and more of a “go up or down” command.
Flight Modes
Keep in mind that how far you push the stick, the drone will react differently depending on what flight mode you’re using. Here are the different flight modes you’ll most likely run into when flying FPV.
Acro. This is the bread and butter of FPV. Acro provides full manual control of the drone. There is no self leveling, putting control completely into the hands of the pilot. If you tilt the drone forwards and release the stick, the drone will maintain the angle you’ve set it in. If you hold the stick in any direction the drone will continuously tilt in that direction until you let go. So if you shove the right stick all the way to the left, the drone will do barrel rolls to the left until you release the stick. There is a learning curve to it, but if you’re going to learn FPV, this is the mode you should either start with, or at least work your way up to. It offers by far the most amount of control, and once you get the hang of it, it’s the most fun.
Angle. Angle mode works most similarly to something like the DJI Mavic. This mode will automatically level the drone when the pilot releases control of the sticks. This offers a bit of a safety net when flying, but try not to rely on this too heavily. When you’re in angle mode the drone won't tilt beyond a set limit, while this makes it easier to pick up and fly, in the long run it limits your overall control of the drone and you won't be able to perform a lot of the maneuvers that FPV is known for.
Horizon. Horizon mode is the awkward middle child between Acro and Angle mode. Much like in Angle mode the drone will automatically level itself when the pilot lets go of the sticks, however when the pilot tilts the sticks past a certain threshold, the drone behaves more similarly to Acro allowing for the drone to do things like barrel rolls and loops. But it’s still not as precise as Acro mode.
Other flight modes do have their use case, a lot of tiny whoop pilots prefer to fly in angle mode for instance, but for the most part try to learn how to fly using Acro. It will give you the most control over the drone, and if you’re aiming to race, fly freestyle, or fly for cinematic purposes, Acro is the way to go.
Conclusion
So that’s everything you need to know to get started flying in an FPV simulator. I’d recommend practicing at least 30 minutes a day for a week or two before venturing into the real world. The simulator is a fantastic tool for learning how to fly and you should try to utilize it as much as possible before moving onto flying something like a 5” FPV drone. Again, crashing in the simulator is free, so take your time and embrace the learning curve. Crash as much as possible in the digital world before flying IRL. Once you get the hang of it, It’ll feel like second nature and before you know it you’ll be hooked!