Featured NewsProduct NewsAccessoriesCompany Profile: Ground Control Drone Resources
11 May 2023
By Mark Kneyse
Drones and their operators run the gamut. Heavy, specialized birds flown by experienced professionals to newbies testing the waters with their latest birthday present. No matter what the experience level, there are certain laws we all have to abide by. Even though the specifics may differ by country, safety is the name of the game and Ground Control Drone Resources was created to aid in that process.
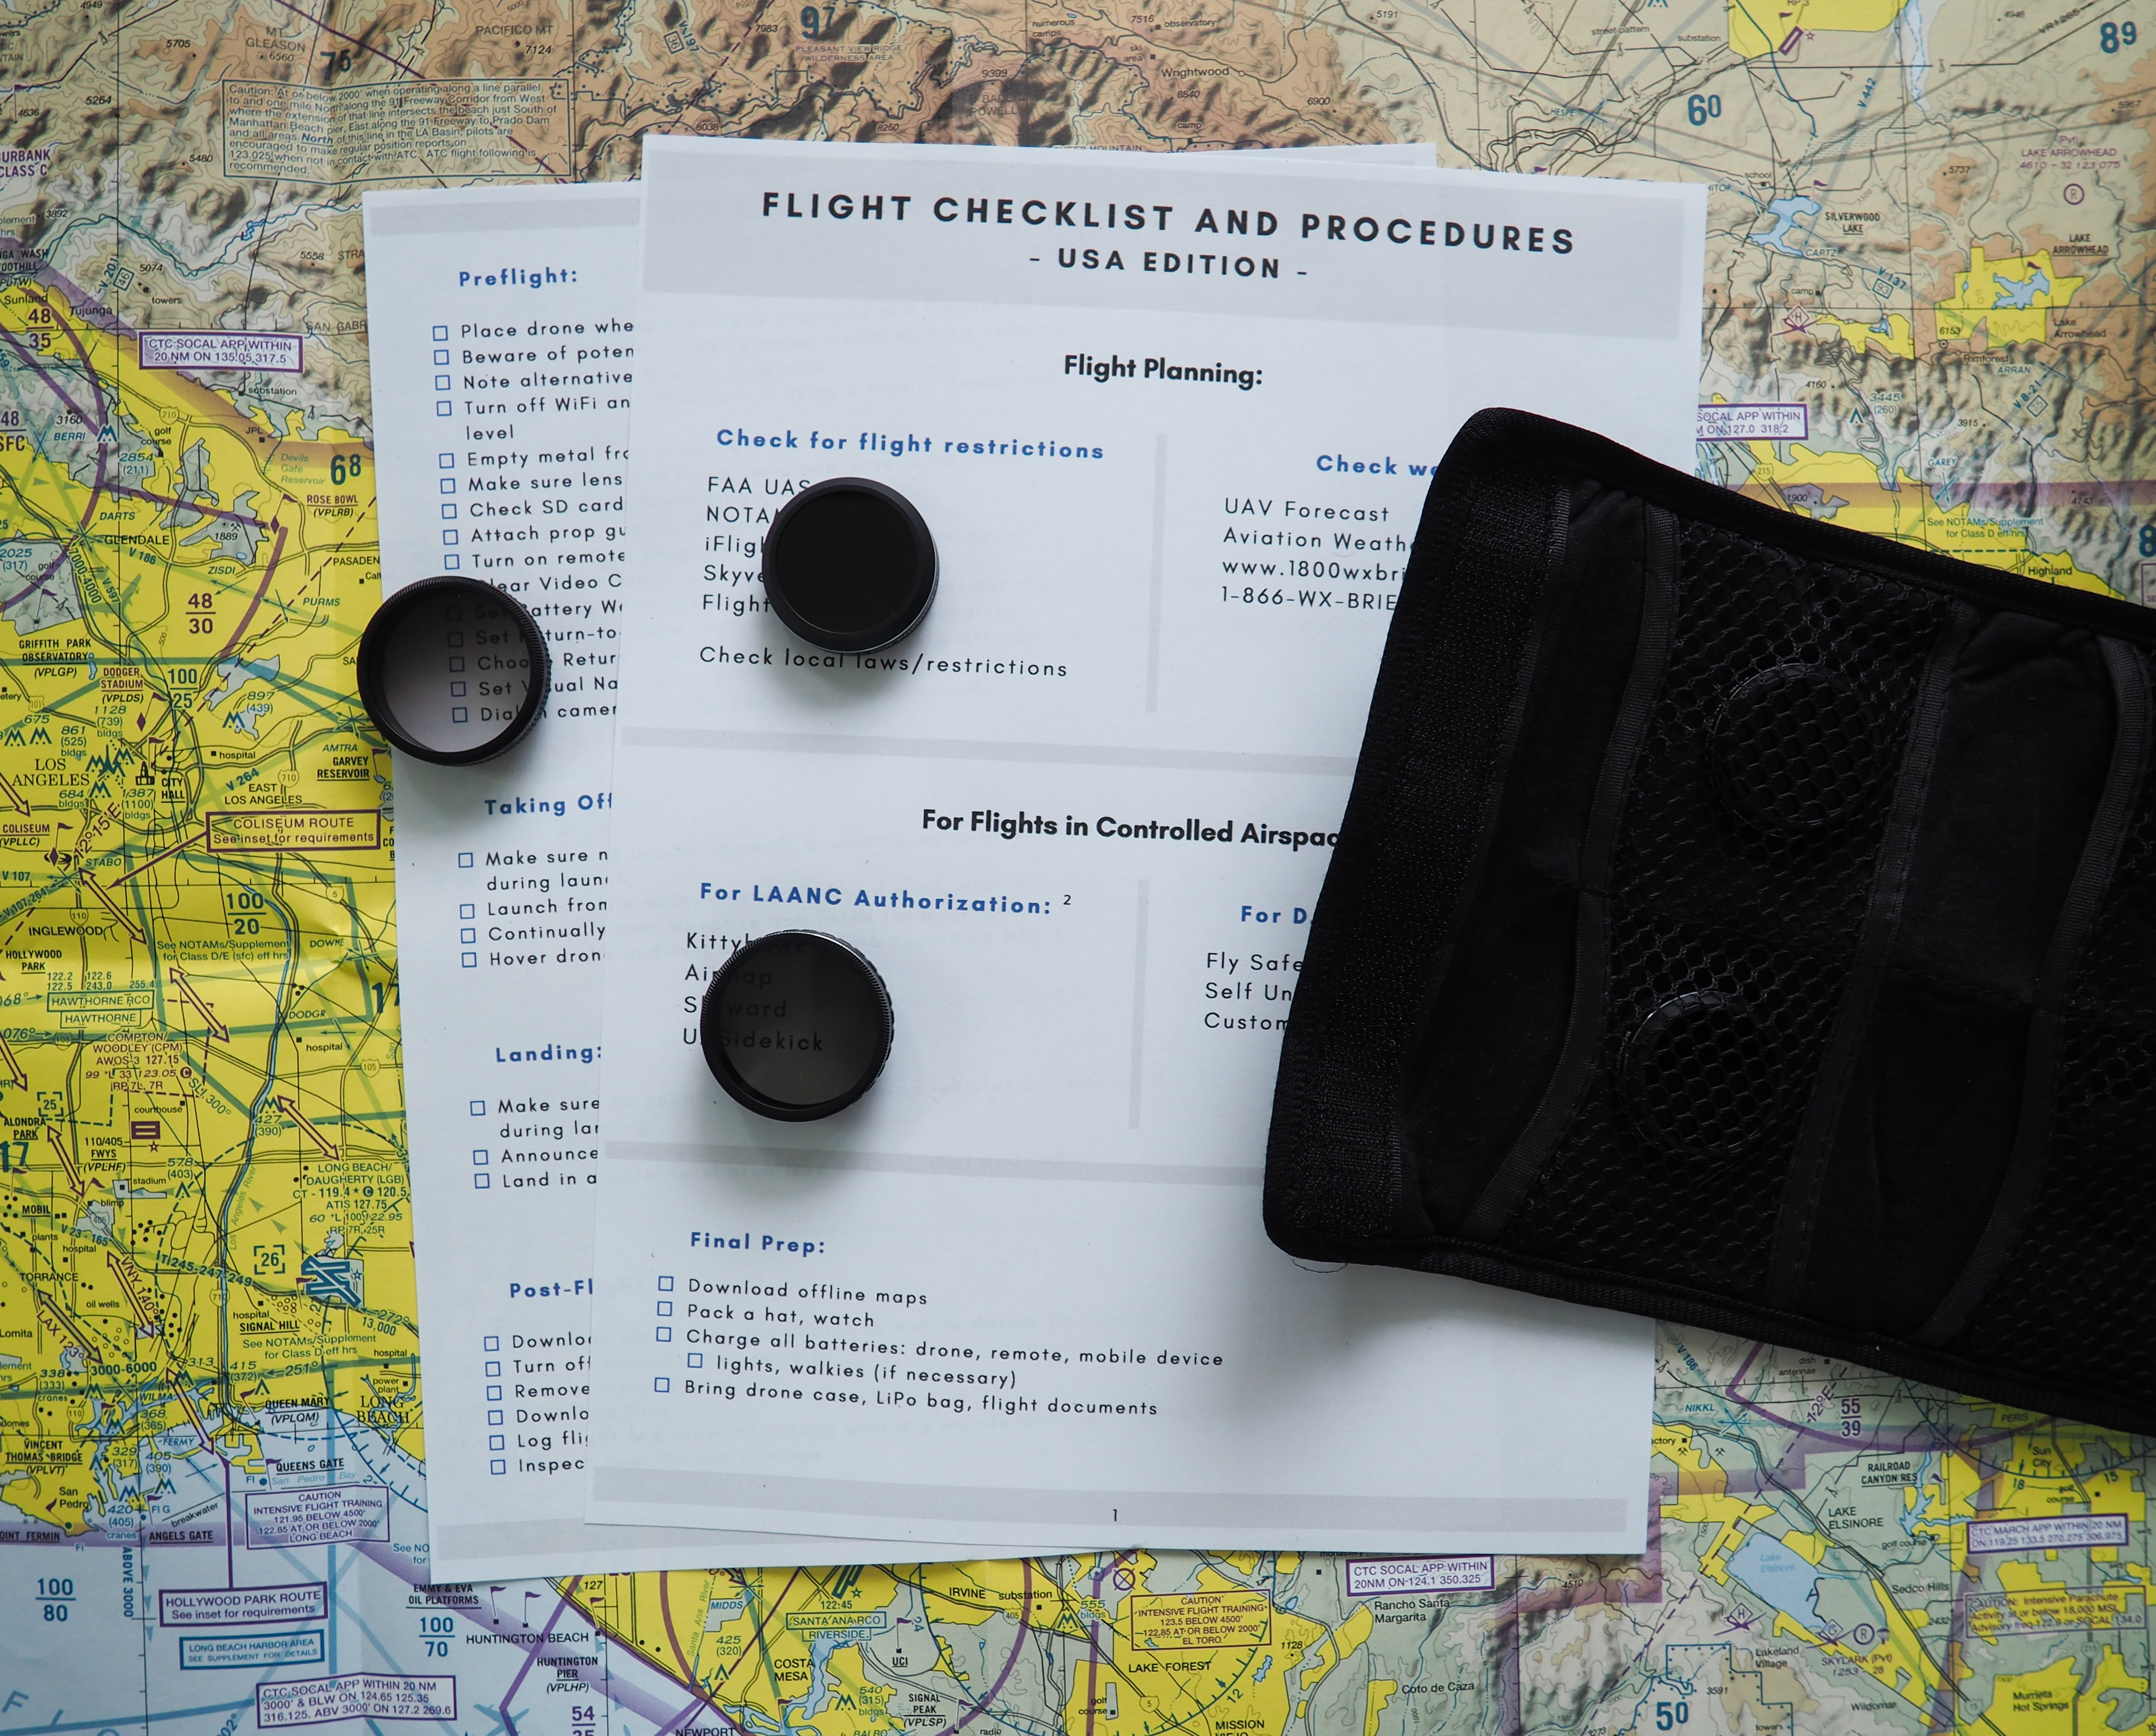
Our signature product is the Flight Checklist and Emergency Procedures document. It’s a Pre-Flight Hub that was designed to be used on your computer at home, your mobile device in the field or printed out and included in your kit. It’s full of links that take you to the sites needed for flight planning and airspace authorization. Similar to an app on your phone, the intention is to have everything at your fingertips, but accessible in multiple ways.
Use code THEDRONINGCOMPANY for 20 percent off any of our products.
I’m a multitasker. So when planning a flight, I prefer to use my computer at home. With my checklist open, I click on its numerous flight-planning links, opening several different browser windows at a time. With all the information in front of me, I can easily read and cross reference what I need to know before leaving the house or even accepting a job.
When preparing for a flight in the USA, I first click on a LAANC site like Aloft or Airmap to see if my flight will be in controlled airspace. If flying a DJI product, I then click the link to their Fly Safe Geo Zone Map to see if an unlock will be required. Next, I’ll check the weather via a site like UAV Forecast and lastly, I’ll give the FAA’s NOTAMs and Temporary Flight Restrictions a look.
When flying in Canada, the Drone Site Selection Tool is good for checking airspace. Finding Provincial Parks (where drones aren’t allowed) is a little harder but we have links to maps for each province and territory showing just that. Also listed are the phone numbers for each Flight Information Centre, plus a map showing the FIC regions. If flying in controlled airspace, our Nearby Aerodromes form is essential for listing the direction and distance you’ll be flying from an airport, plus it has room for the aerodrome’s name, code, emergency phone numbers and more. This information can be typed in on your computer or filled in by hand. And if you need to convert a street address into GPS coordinates, there’s a link for that, as well.
After the Pre-Flight Hub section is the actual checklist. This includes checkboxes that can be ticked via computer, mobile device or penciled in, depending on how you’re using it. This is a more general list that can be utilized by most drone operators around the world. It was formatted to fit onto one page, so it can easily be included in your drone kit. We understand that everyone has different procedures and our checklist is intended to be more of a guide. Hopefully there are some useful nuggets that keep you from forgetting an important step or help avoid an accident down the road.
The next sections are our Emergency Procedures and Troubleshooting Tips. Since reporting an accident or flyaway differs from country to country, our USA and Canada checklists include when you need to file a report and links to the corresponding government agencies.
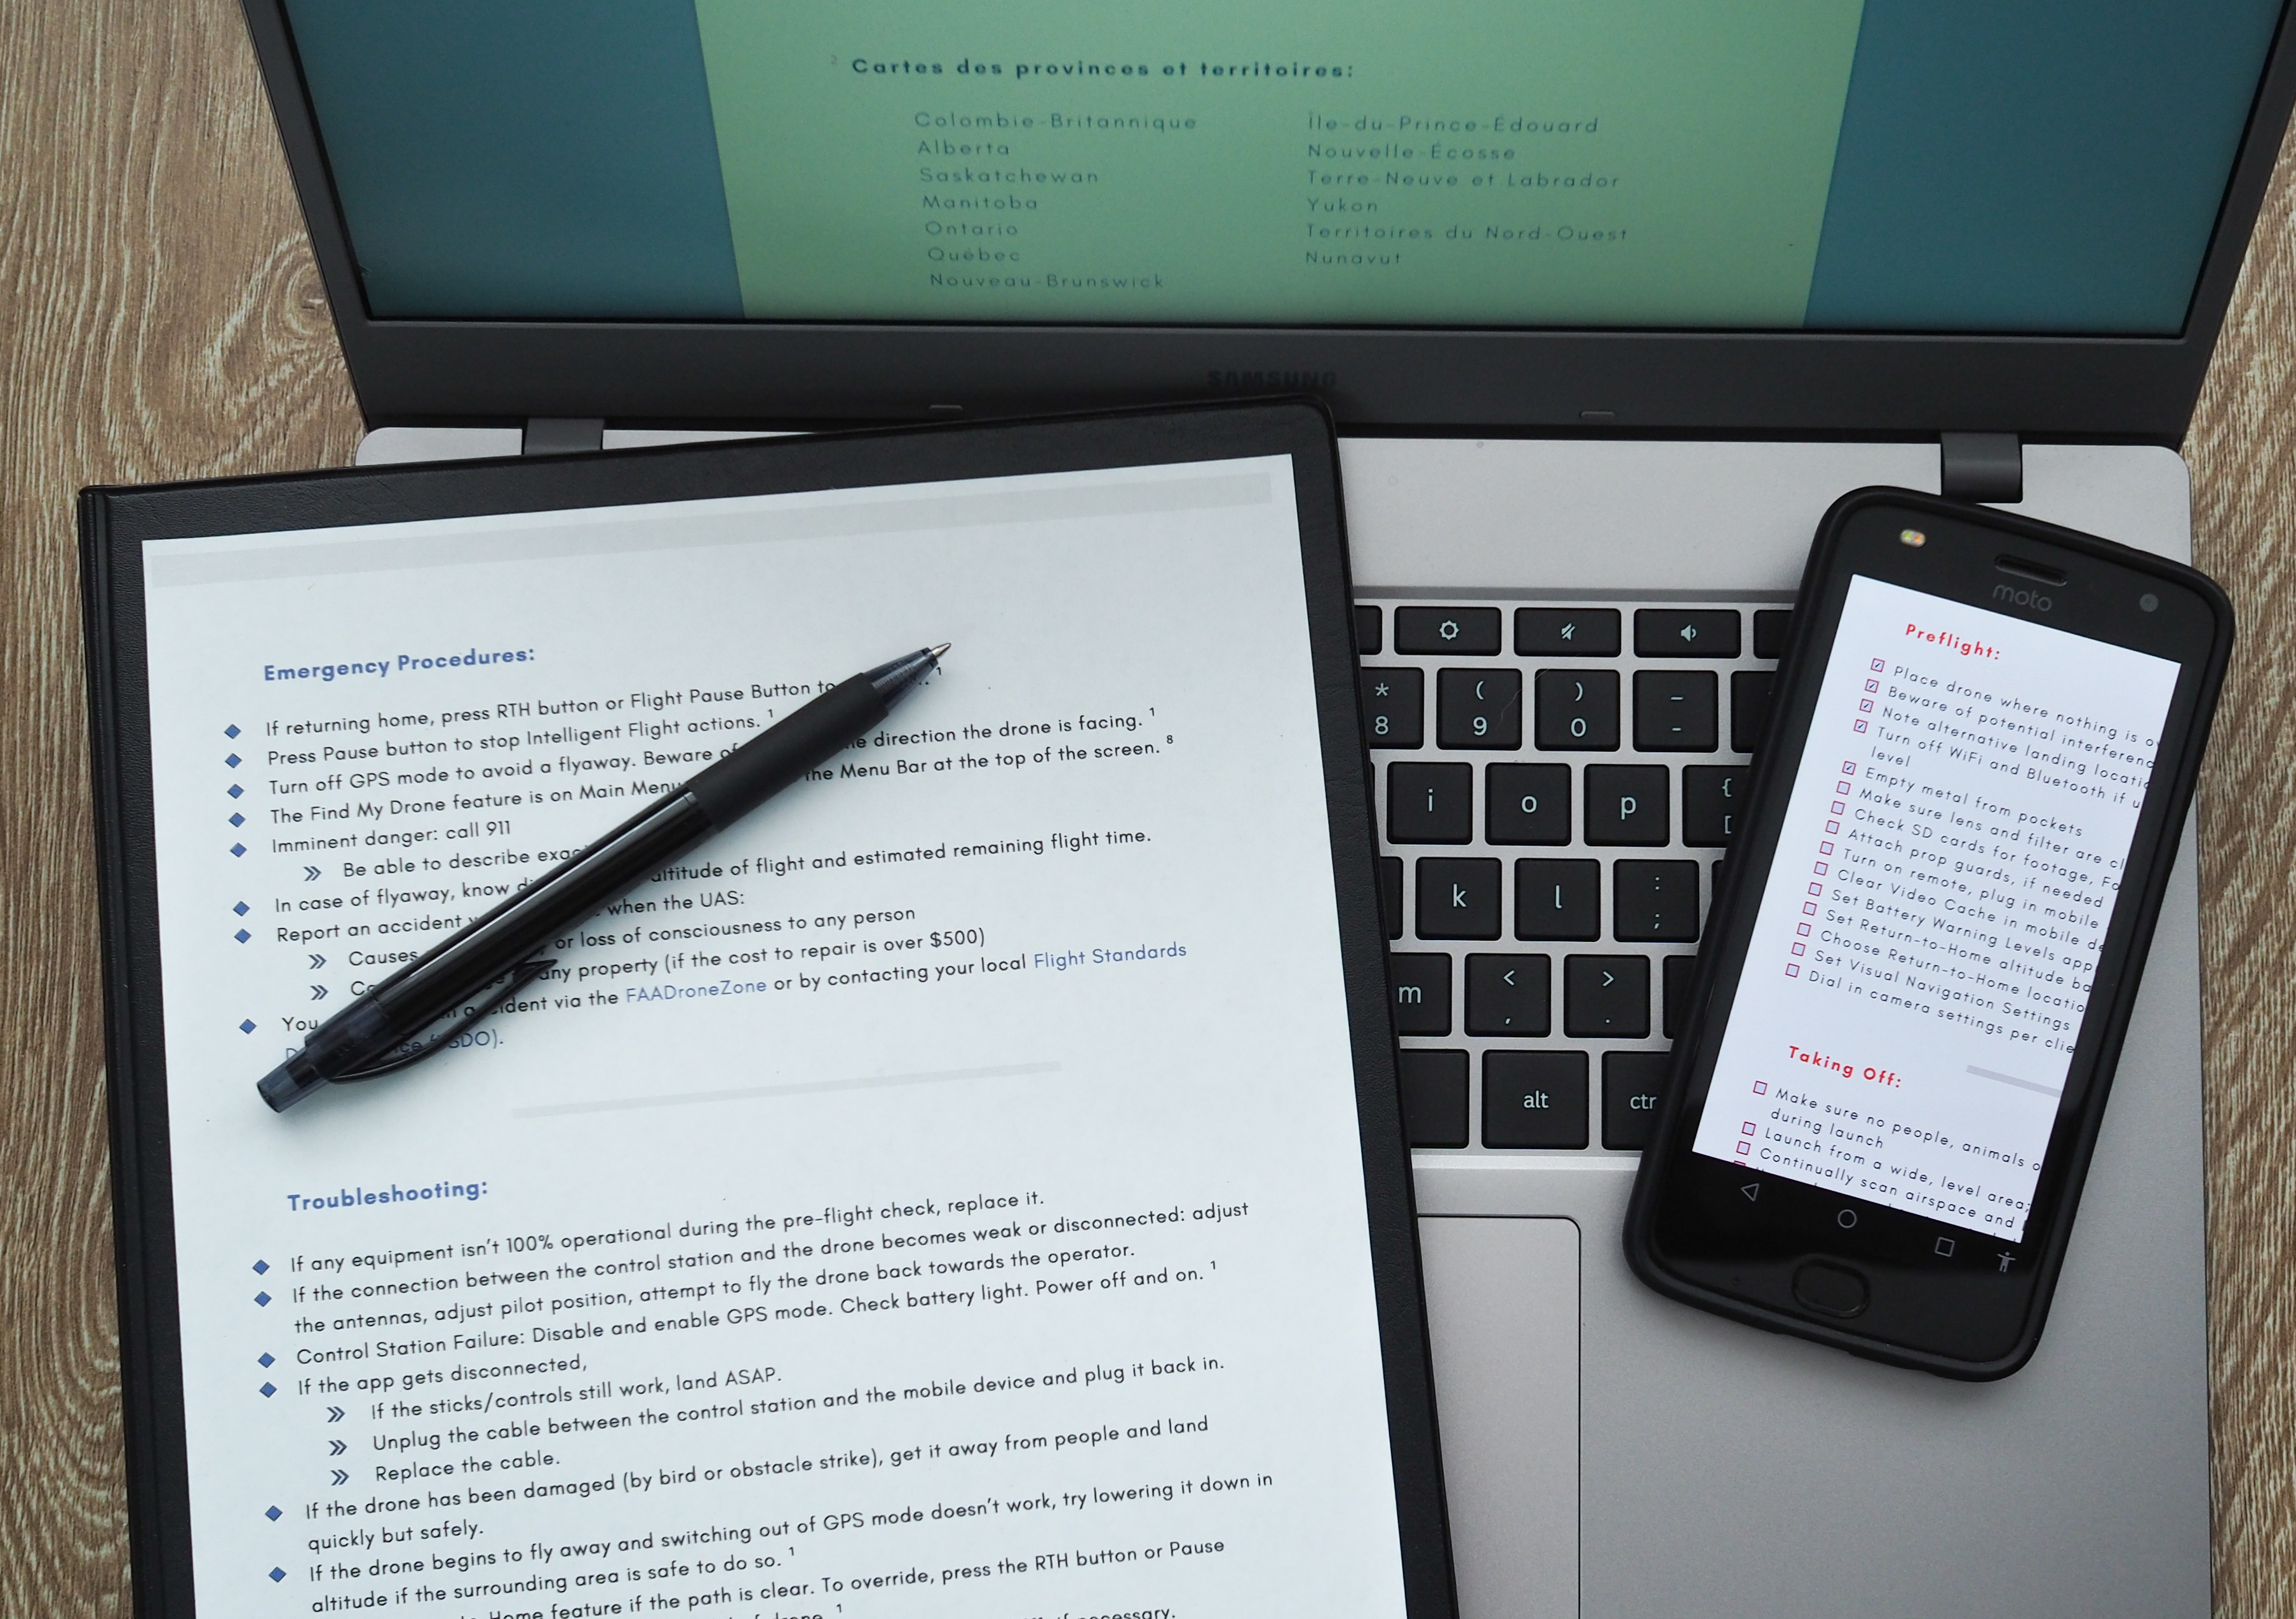
The last page includes recommended settings for flying indoors. Even though it’s DJI-specific, no one wants their drone to return home when there’s a ceiling overhead. Operators of other brands will benefit even if their setting names differ slightly. Also on this page are regulations for flying at night (USA and Canada only) and links to information about nighttime illusions. I use at least some portion of my Flight Checklist and Emergency Procedures document every time I fly. With so many details to worry about: from locations and laws to weather and camera settings, it helps to have everything laid out in front of you - especially when flying for a client and distractions are more likely. As mentioned, I access my list on the computer for pre-flight planning and then use the printed out version when in the field. For those that prefer to use their phones, it works great on there too. This checklist is about having all the necessary information available, wherever you may be.
Another product that we offer is our Guide to Hyperlapse Creation document. Even though some drones have a Hyperlapse setting, you have much more control over the end product by following our steps and recommendations both during the shoot and afterwards in the edit. Considering how much time goes into planning each of my hyperlapses, getting just one detail wrong can make all of it a wasted effort. That’s why I use my Hyperlapse guide every time.
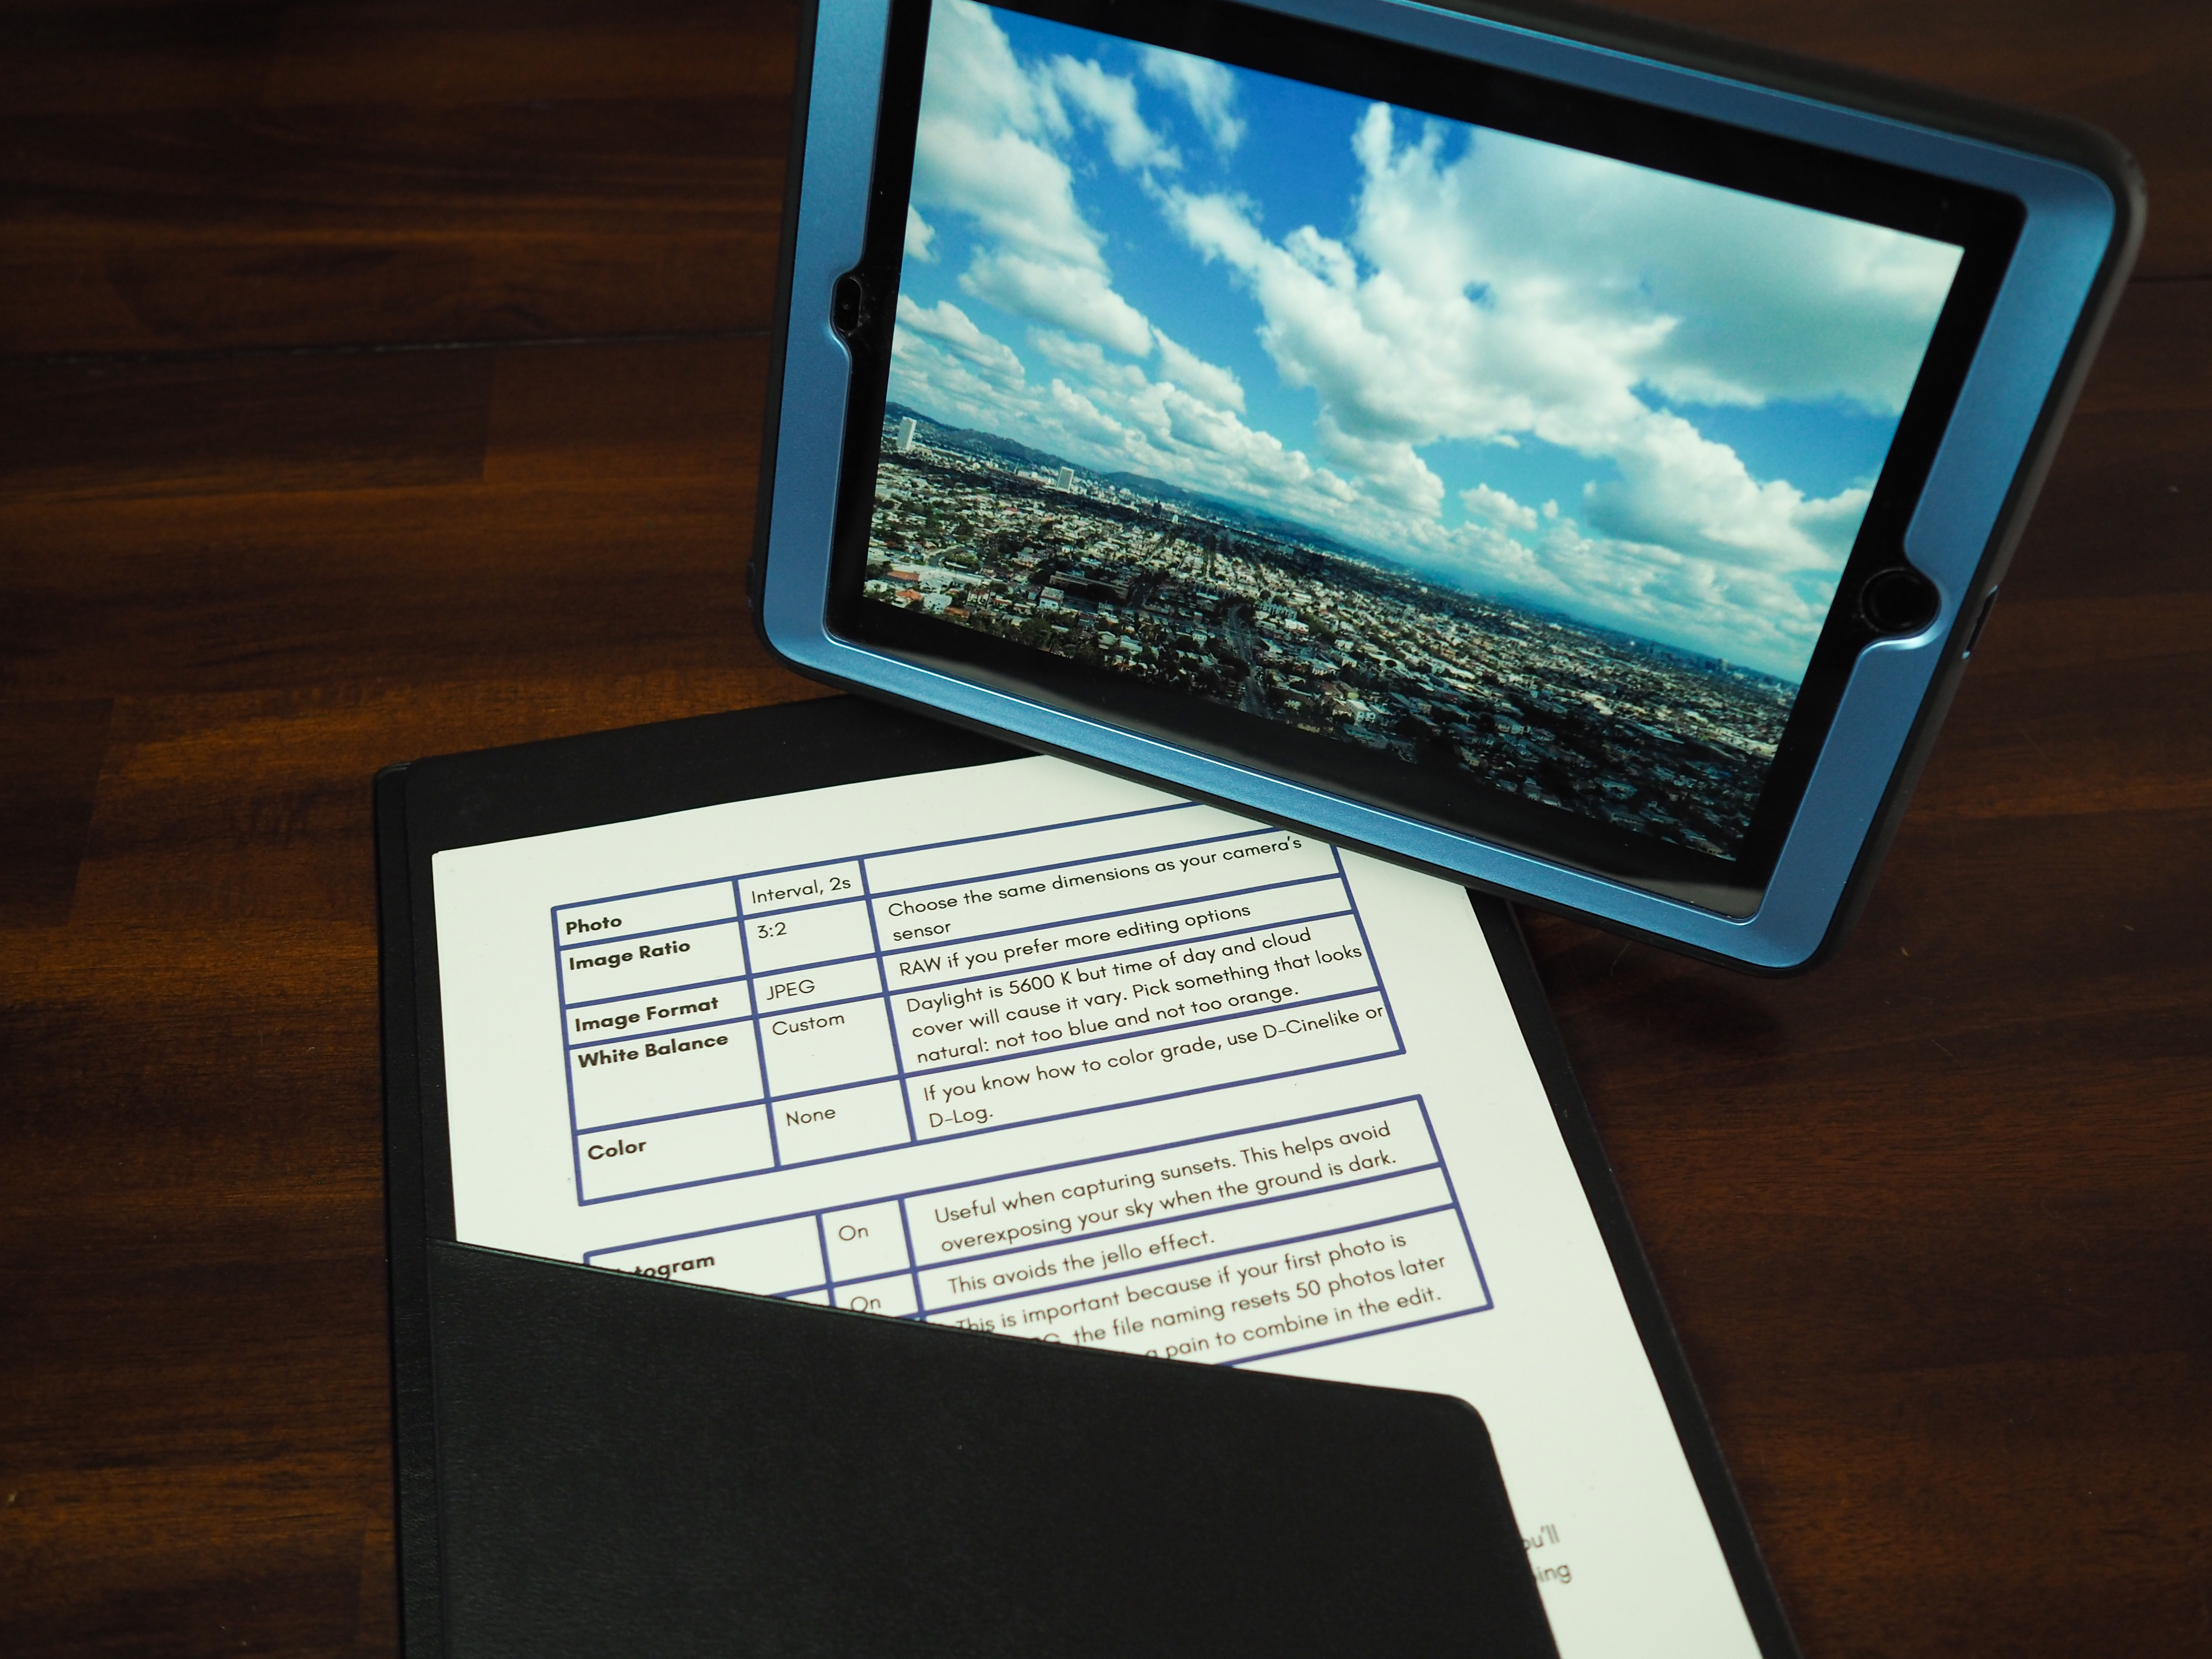
For those that are new to hyperlapses, I explain what I do and why. That way you aren’t blindly following my recommendations. You can use my settings as a baseline and find what works for your particular situation. A perfect example is day vs night settings. Typically, I prefer the mechanical shutter. But at night I go with the digital shutter, hoping it’ll create less shake in those low light conditions. Another recommendation is to find the dimensions of your camera’s sensor and chose an aspect ratio that matches (for my Phantom 4 Pro V2.0 it’s 3:2). That way you’re capturing as much information as possible and will have plenty of detail to spare after any stabilization or cropping that might occur.
For those of us without much editing experience, this portion of the Hyperlapse guide is essential. It explains how to edit all your photos in one fell swoop and then import them into your preferred editing software. I then step through the editing and stabilization process. And finally I offer advice on exporting options. I use Adobe products so my workflow is Lightroom → After Effects → Media Encoder but there are plenty of other great options out there. Again, all these details are easy to forget so having this guide is not only a great starting point but also a helpful reference guide.
About the Author
Living in the US, I obtained my Part 107 on the first day it was offered. I had already created my own flight checklist but after moving to Canada, I realized a whole new checklist had to be created for a different set of laws and procedures. Compiling all this information into two well organized, clickable documents shortened my pre-flight planning times and I figured others could benefit from them, as well.
Shortly before the move to Canada, a friend showed me some hyperlapses he had shot and I was hooked. From a creative standpoint, my mind was spinning with all the cool ideas I wanted to try out. I watched a ton of instructional videos on both the “how to fly” and the “how to edit” techniques but I discovered they didn’t have all the answers. After a lot of trial and error, I started to find what worked for me and what didn’t. Like the checklists, I had to write everything down or else I would forget. Especially with the editing, which I didn’t do often enough for it to stay fresh in my mind.
A funny side note: By 2020 I had already shot a wide variety of hyperlapses but needed a couple more to finish my reel. When COVID hit, I finally had the time to get those last couple of shots. Unfortunately, when I needed traffic and movement, all I got were empty streets.
To learn more, please visit Ground Control Drone Resources. Feel free to check out that hyperlapse reel here. And you can follow me on Instagram @directdronecamera.
